For me, VirtualBox is a better alternative to Virtual PC. Although, VMware Player also gives Microsoft run for their money. VirtualBox doesn’t require you to register an account to download, and runs smoothly with no compatibility issues (yet). Another plus, is that VirtualBox will run just about any operating system (OS) you can think; for the full list read this.
To make use of VirtualBox you’ll need:
A bootable drive for installing the operating system your virtual machine (VM) will run. In my example, I’ll be using a Windows 7 setup disk. orA pre-built Virtual Machine. You can download these from many sources, but we’ve only linked to the official ones.
Installation
To get started, download the Virtual Box installer. VirtualBox is available for OS X, Linux, and Solaris. In this walkthrough I’m using Windows 7 –so the process might vary depending on what OS you are using.
You’ll see a plethora of options on the Custom Setup page, but if you aren’t sure what you are doing just leave them as they are.
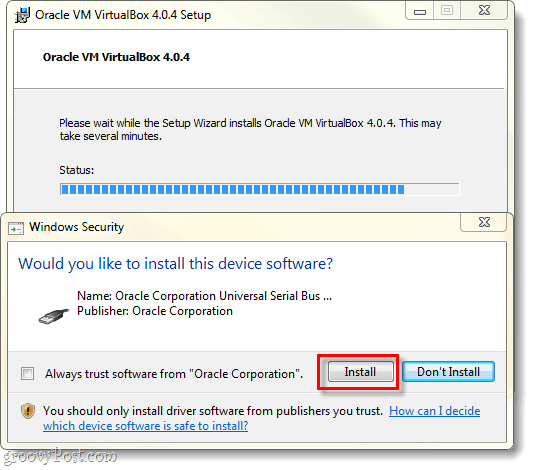
Setup will take 5-10 minutes depending on your system’s configuration, and if you are running Windows you’ll need to sit through it. Every few minutes a Windows Security dialog will appear, and you’ll need to Click Install to allow Virtualbox to setup virtual peripherals.
How to Create a Virtual Machine
Once setup is complete, you can run VirtualBox and then the VirtualBox manager will appear. This is the screen that you will use to organize, start, delete, create, and change your virtual machines. Though, at this point there isn’t much you can do because you don’t have any virtual machines. So, let’s create one; Click the New button.
The enthusiastic and useless “Welcome to…” screen will appear, just Click Next.
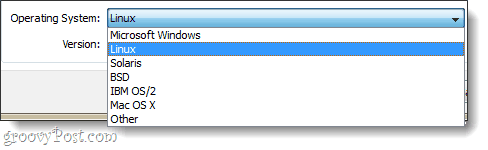
Now we should be on the VM Name and OS Type page. Here you get to set what you want your virtual machine to be named on the VirtualBox Manager window. The next thing to do on this page is select what operating system (OS) you will be running on the virtual machine. Keep in mind that you’ll need a bootable drive with the installation files for the OS you select –VirtualBox does not automatically install the operating system for the virtual machine. However, if you have a premade VM then you shouldn’t need to worry about installation.
On the next page you’ll Select how much of your computers physical memory the VM is allowed to use. Tailor this amount of ram to match up with the requirements for the operating system that the virtual machine will be running. In my example I’m installing a virtual Windows 7, so 1GB (1024mb) of RAM is ideal. But, keep in mind not to overdo it –your host machine still needs ram to function!
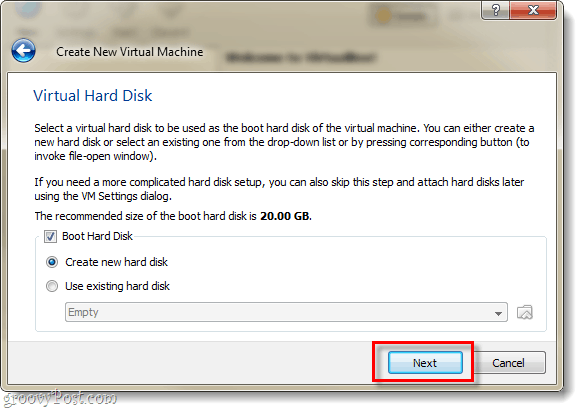
Next you’ll be prompted to create a hard disk. If you creating a new VM and need to install the OS, just leave things as they are and Click Next. If you have a pre-built VM, then Select the pre-built virtual hard disk and you’re done! Assuming you don’t have/want a pre-built VM, continue reading.
Next you’ll be brought to the virtual disk wizard, say hello to another useless welcome screen; it does serve as a nice transition though.
You’ll have two options for storage, dynamic or fixed.
Dynamic starts as small as possible and it will slowly grow to the maximum size (that you will set it to on the next page) as needed.Fixed is always the same size, which you choose on the next page.
I recommend using dynamic. But, if you have special needs or plan to transfer some large files, then Fixed might work better for you.
As mentioned, the next page lets you set the maximum size of your virtual disk. You can choose anything from 4MB to 2TB (2,000GB!). Also on this page, you’ll set the name of the virtual disk; to keep things simple I named mine the same as the virtual machine.
Now you’ll be presented with a summary page for the virtual disk creation, just Click Finish.
And now, one more summary page. This time it will be a summary of the virtual machine that you creating. If something doesn’t look right, don’t worry because we can change it even after the virtual machine is created.
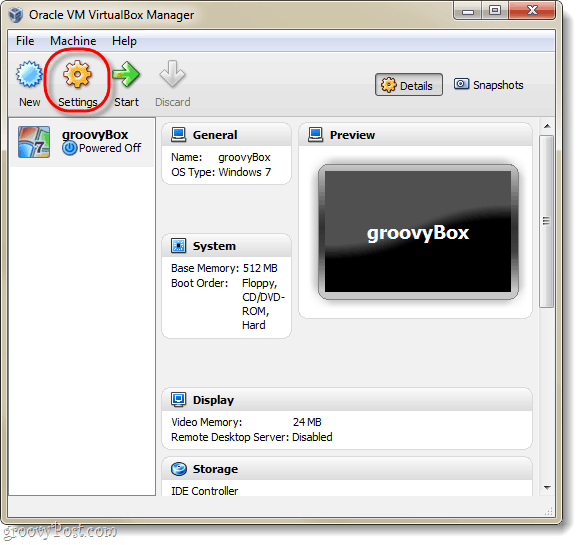
Alright, we’re just about done with the VirtualBox stuff… You should now be brought back to the VirtualBox manager. The manager will display most of the settings for your VM in the right-pane, and if you want to change any of these you’ll need to do so before you start the VM. To do so, Click the Settings button.
In the settings Window you can change just about anything –including things that weren’t in the setup wizard. For all intentions the default settings are perfectly fine. But, if you are a power user and you want to setup some advanced configurations, then by all means; adjust away!
Once you’ve got the settings where you want them, Select your VM and Click the Start button.
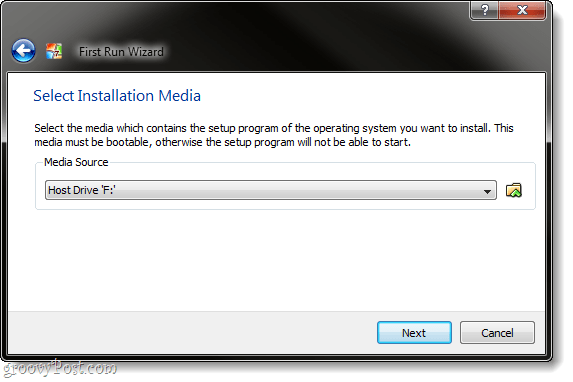
At this point the virtual machine is nothing more than a blank hard-disk. You need to set up an OS, just like you would with a physical computer. The First Run wizard will appear to help you with this.
The wizard will now ask you to specify a bootable setup program source. This can be a DVD-Rom in your physical drive, a USB stick (advanced), a customized installation VM (advanced), or a bootable network location. The easiest way to do it is probably to use a DVD… We’ll cover making the other types of boot devices in another groovy tutorial.
One last, informative, Summary page. Click Finish.
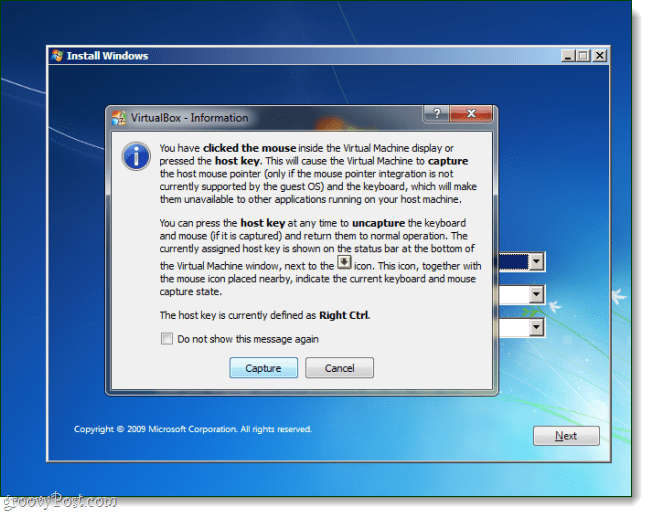
In my example I’m setting up a Windows 7 virtual machine, so I used a Windows 7 installation DVD. From this point on, it’s a lot like a physical computer. You’ll have to go through the OS setup, and then you’re good to go. I won’t cover setting up Windows 7, since it is exactly the same as it would be on a normal computer –besides, you might be installing Linux or some other operating system. One thing that might be a little annoying and/or confusing, is the keyboard/mouse capture that the virtual machine does. Whenever you click inside the VirtualBox window, it will take control of the keyboard and mouse and you won’t be able to exit the window unless you press the host key; the default host key is the right Ctrl.
If you change or forget your host key, it is also displayed at the bottom-right corner of the VM window.
Done!
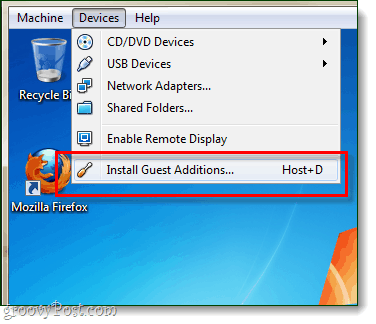
Once your OS installation is complete, you have yourself a virtual computer! There is a lot you can do at this point in terms of customization, but that is all there is to it as far as setup is concerned. One thing though, that I would consider obligatory are Guest Additions.
To setup Guest Additions: from the VirtualBox VM window, Click the Devices menu and then Select Install Guest Additions. This will load the Guest Additions setup disk into the virtual machine and the process is rather straight-forward from there.
Have you already used VirtualBox, VMware, or Virtual PC? We’d love to hear your feedback in the comments below! However, I’ve also heard that Windows 7 is able to detect that the hardware your OS is running on is Identical, so rumor has it you can run as many VM’s as you like as long as they are all on the same computer. Comment Name * Email *
Δ Save my name and email and send me emails as new comments are made to this post.


![]()
