The Windows HomeGroup feature lets you share files, folders, and printers connected to your local area network with other Windows computers. Each computer connected to the HomeGroup can share its library of pictures, music, videos, documents, and printers with other computers on the same HomeGroup. Any computer running Windows 7 or later can join a HomeGroup. This tutorial sets up a Windows Homegroup in Windows 10, but the steps are also applicable for Windows 7 and Windows 8/8.1. You can also check out our previous articles: Windows 7: How To Set Up Homegroup Sharing and Set Up Windows 8 HomeGroup Sharing with a Windows 7 PC.
Setting Up a HomeGroup in Windows 7, Windows 8, and Windows 10
To create your first HomeGroup, click Start > Settings > Networking & Internet > Status > HomeGroup. This will open the HomeGroups control panel.
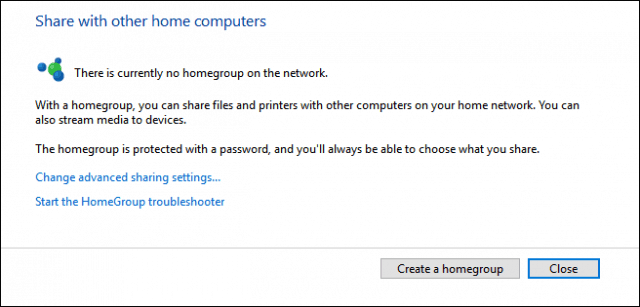
Click Create a homegroup to begin.
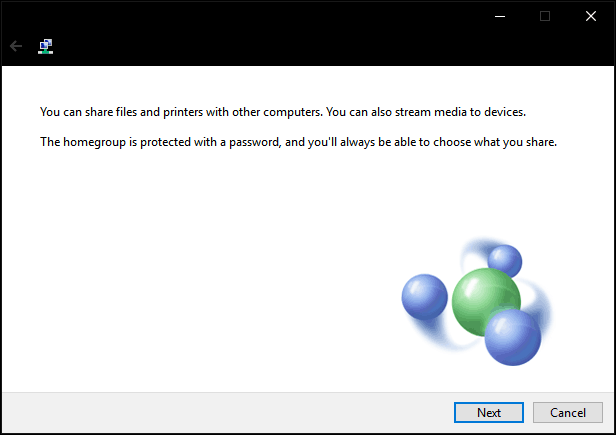
Click Next.
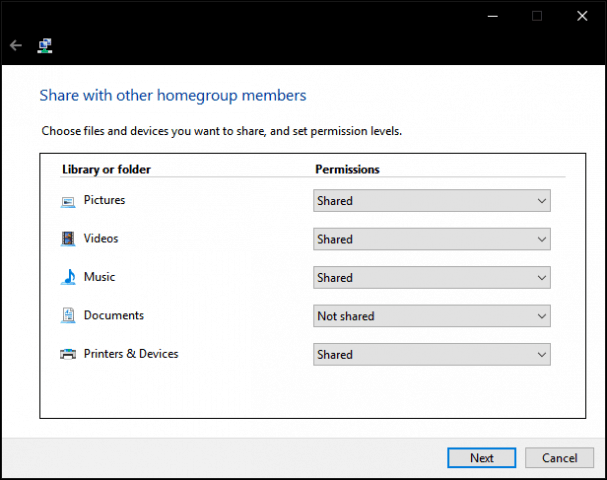
Click in the list box under Permissions, then choose the items you would like to share with other computers on your home network. These items are your libraries for your Windows user account. Read our article on how libraries work in Windows if you’re not sure what’s in these. Click Next.
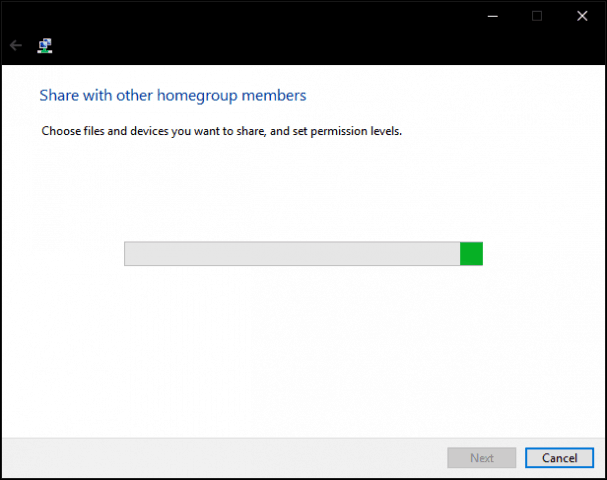
Wait while Windows configures your selections.
A password will be generated. Write this down; you’ll need to enter this when joining other computers to this homegroup.
Joining a Homegroup
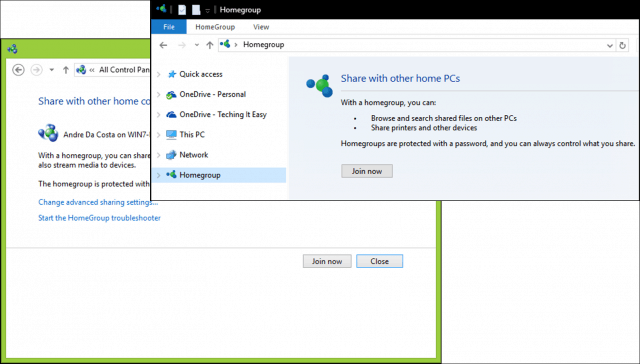
Next, open File Explorer, click Homegroup in the Navigation pane, then click Join now. If you don’t see HomeGroups in File Explorer, open Settings > Network & Internet > Status > Homegroup and click Join now. If you still don’t see Homegroups, read the Troubleshooting Homegroups section below.
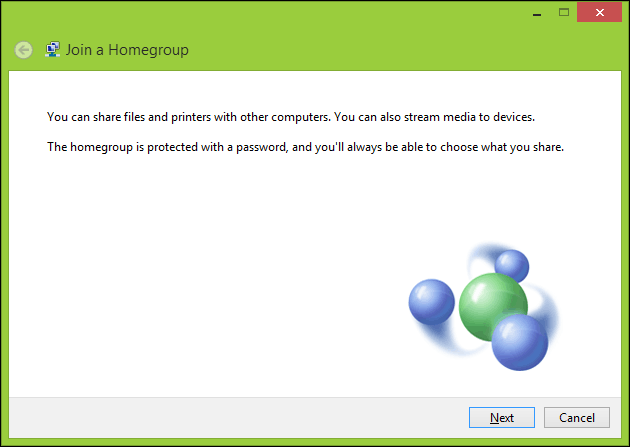
Click Next
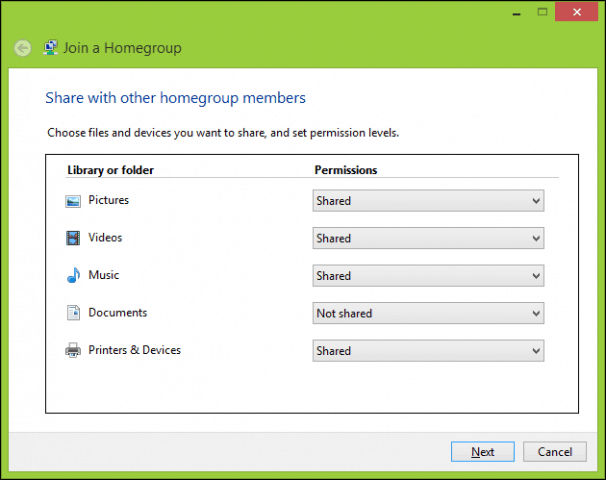
Choose what you want to share and then click Next.
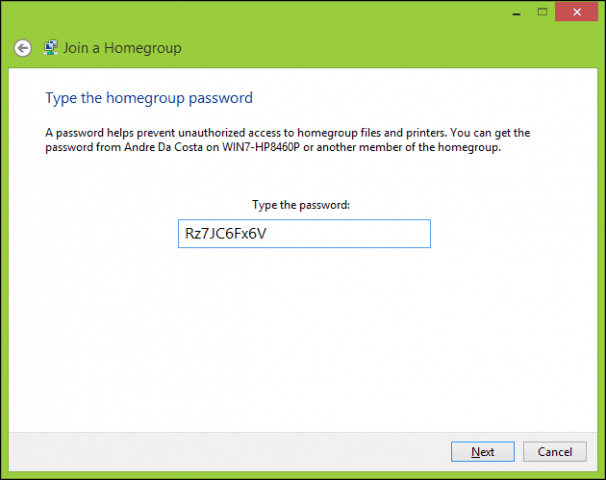
Enter the password generated earlier, then click Next. This might take a while, so hang tight while Windows configures your homegroups permissions. If Windows no longer detects a homegroup, close the wizard, then try again.
Browse Homegroups
To view the contents of a homeGroup, open File Explorer, expand homegroup then choose one of the available homegroups listed.
Troubleshooting HomeGroups
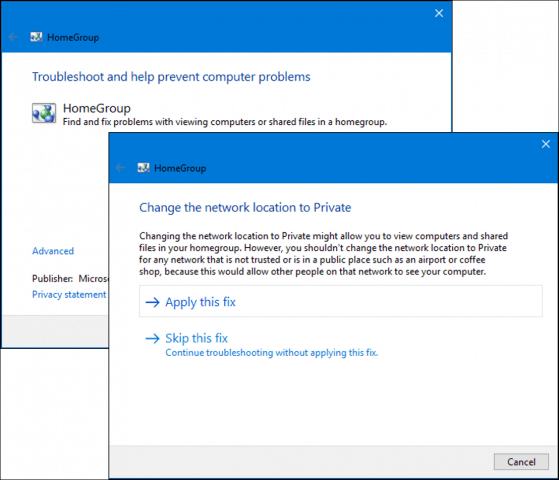
Before you can get HomeGroups up and running, your network environment must be set to Private. To do this, right-click the network icon in the Notification Area, click Open Network and Sharing Center, click HomeGroup in the left-hand corner of the window. Click the Start the HomeGroup troubleshooter link to begin troubleshooting, then follow the on-screen instructions. You might also need to run the HomeGroup troubleshooter on the computer where you created the HomeGroup.
There’s another way to configure your network as private: open Network and Sharing Center and click Change advanced sharing settings. Expand Private, select Turn off network discovery, then click Save changes.
Open Network Explorer, then click the Network discovery is turned off the banner, then choose Private.
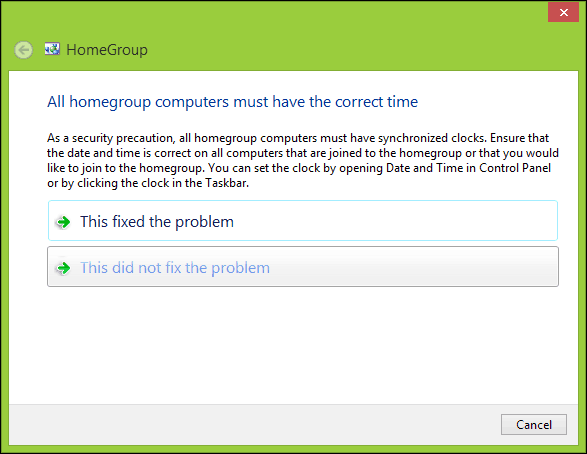
Another issue I discovered that can prevent HomeGroups from being detected is the date and time. You should ensure computers connecting to HomeGroups have synchronized clocks. Check out our article for instructions on how to adjust your date and time.
If you still experience problems connecting to HomeGroup, Windows Firewall might be blocking it. Click Start, type: Windows Firewall, and hit Enter. Click Allow an app or feature through Windows Firewall, click Change settings, make sure HomeGroup is checked, then click OK. Repeat these steps on each computer.
Managing Your HomeGroups
If at any time you would like to modify or change the settings of your HomeGroups, open Settings > Network & Internet > Status > HomeGroups. There you can update your HomeGroups password, change what type of media gets shared with other computers, or leave the HomeGroup.
Conclusion
As you can see, getting all your Windows computers on the same page with HomeGroups can sometimes be a tricky process. But once you’ve set up your HomeGroup, sharing libraries and printers among your connected computers is incredibly easy and convenient. This is a great way to share photos with all your computers from your main PC or access a music library from a centralized location. Do you use HomeGroups? Let us know in the comments. Want to achieve something similar on other platforms? Check out How to Network Windows 10 and OS X, Share Files, and Connect Windows 10 to Wired, Wireless, and P2P Networks. Comment Name * Email *
Δ Save my name and email and send me emails as new comments are made to this post.
![]()


