What You Will Need:
To starting things off, let’s take a look at a groovyVideo I made which reviews the How-To steps below real-time. Following the video, I’ll review the steps in a typical step-by-step fashion as well.
Photography Tips – Taking a photo of the sky:
Do’s:
Take several photos – Of the image you’re trying to capture. I usually will take a few dozen just to make sure I get the shot I’m looking for.Use a tripod (if possible) – This will reduce the chances of any blurriness or smudges in the final photo especially in low-light situations where you’ve reduced your ISO to minimize the noise in your photo yet slowed down your shutter speed to let in enough light.Try different white balance modes – Most cameras come with a cloudy, sunny, daylight, and twilight white balance mode. Try them all out to find which one works best for you.Visualize what the final will look like – While taking a photo, try to visualize how you want your final to look and whether that is possible with the current photo or not.Download an image of the sky from the internet – If you’re not good at taking photos or if you don’t think your camera is good enough. Any image will work fine as long as it is hi-res and it will work for your particular case. Just make sure to ask permission if the image isn’t labeled as royalty-free / open source.
Do not:
Shoot directly at the sun (unless you have a professional camera and you know your way around photography) – Shooting directly at a cloud scene with the sun in it will make your image too dark since your camera will try to automatically lower the brightness to maintain image detail not to mention the solar flare which could result.Shoot clouds that are not thick enough and are semi-transparent. Although photoshopping something in between two see-through clouds is possible, you will often find yourself hitting Ctrl+Z every time you make a tiny mistake and this will get frustrating and confusing with all the layers and selections you’ll have to be doing.Use a phone – Nowadays’ smartphones have really good cameras but, most still disappoint in comparison with a point-and-shoot camera. Shoot your image with a phone only if it is your only choice and you have no one to borrow a camera from.
Tips for taking a photo of yourself (or your item):
Do’s:
Shoot in a well-lit environment – Even if the sky you’re going to work on is dark, it is better to shoot in a bright room so that you can preserve more detail. As for the sky – you can match the brightness and tint of your image later in Photoshop.Use macro and macro lens for close-ups (if possible) – If you’re going to shoot your item from up-close (anywhere from 15cm to 9mm and less) use macro – it focuses close objects nicely and as a result, you get a crisp high-quality image.Try to separate your object from your background – The bigger the difference in color between your object and its background, the less cutting you will need to do in Photoshop (less work). Try using a green screen or any brightly colored surface or cloth to ease up the process for you.
Do Not
Shoot your object at an angle – Shooting at an angle will make your image look fake and you don’t want that, do you… If you are going to shoot at an angle, make sure it is close to perfectly matching the angle of the clouds in your photo.Move – Moving your arm or object will cause blurriness in the final photo unless you set a really high shutter speed. If you have a well-lit room, however, you should be OK there. Probably better to just stand still and get a friend to help assist with the shot.
The Techniques:
1 – Cut out the object background before placing it into the sky image: This will help you a lot since you will also be able to save a PNG of your object separately, in case something goes wrong. Tips:
Use the Refine Edge dialog box. The Refine Edge feature of Photoshop is your friend and can only push you towards a better result.
All lasso tools and the spot healing brush tool are also your number one trusty companions for this job – use them wisely and you might just do something better than expected.
2 – After placing your object, move it in and resize it to fit exactly into the area you want it to be:
This is not exactly a technique, but rather a more correct approach to how we would want to accomplish the task. 3 – Use any known selection tools to mark any clouds in the image which need to overlap the object: Easy, right? Maybe not – in fact, it’s perhaps the toughest part. Take your time here – the better you make this selection, the better the final result. Tips:
Select > Color Range can literally save you minutes of boring selections. Just mark white as your primary color and watch as all the clouds get selected in a split second. Oh, and those clouds which mustn’t be in the selection? – Simply grab any lasso tool and subtract them from the selection, or retry your color range with localized color clusters.
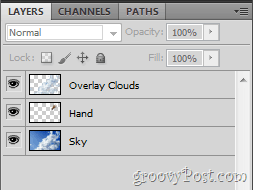
4 – Copy the selected clouds and paste them on a new layer above the layer with the object: Final and easiest step, but the actual real key to the final result.
Tips:
Blur out any clouds that are supposed to softly blend in with the background and slightly sharpen any small cloud areas to add a bit more detail into your image and boost the feeling for realism.
If something doesn’t look right, pick up a 1% Flow Eraser and softly smooth out any fake-looking areas. Same goes for any too see-through parts, which can be fixed with a 1% Flow white brush.
Additional Photoshop Tips for Taking Pictures of the Sky:
Use Color Filters if the color tone in your image doesn’t match the one in your object. For darker images and for images with a moon, use a cooling filter, and for sky images with a sun use a warming one. Here’s an example with the image you saw as my wallpaper up in the video tutorial:
Thanks for checking out this Photoshop technique tutorial! Oh, and for those of you who didn’t quite understand all of this, you can always start with the basics, or check out other Adobe Photoshop tutorials! Comment Name * Email *
Δ Save my name and email and send me emails as new comments are made to this post.


![]()
