The first thing you need to do is verify your hardware is capable of running Hyper-V. Your computer’s CPU needs to support SLAT. The best tool to test if your AMD or Intel CPU supports SLAT is CoreInfo by Mark Russinovich.
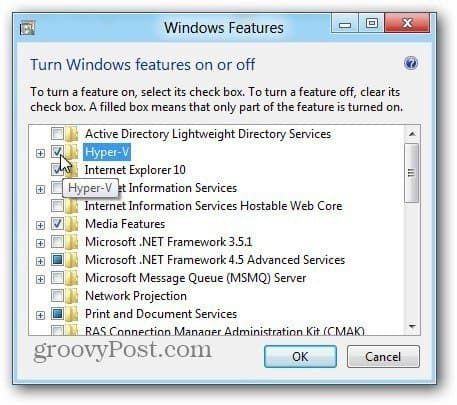
Next, you need to Enable Hyper-V in Windows 8, which isn’t on by default.
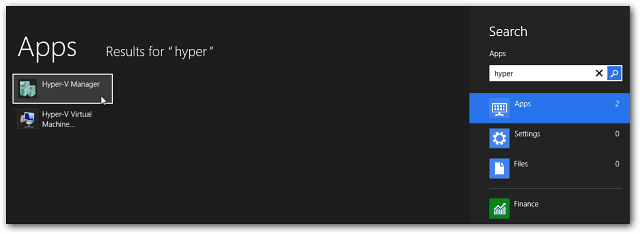
Now that Hyper-V is enabled, launch Hyper-V Virtual Machine. You can get to it from the Metro Start screen by searching for Hyper-V and clicking the Hyper-V Manager icon.
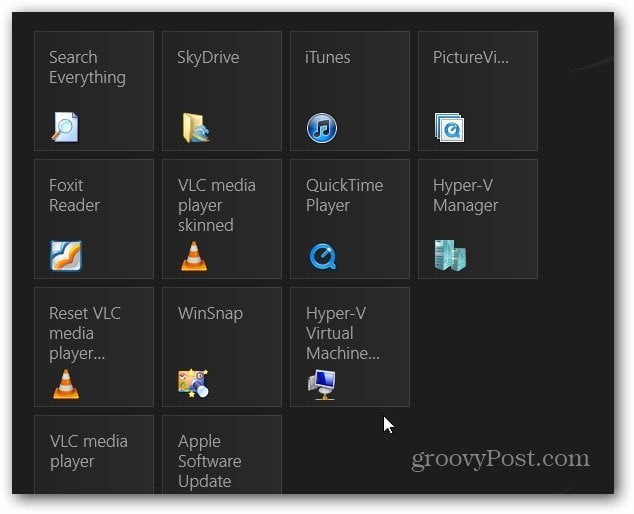
For easier access, I recommend showing Administrative Tools on the Metro Start screen to have access to the Hyper-V tiles. Select Hyper-V Manager.
Create a New Virtual Machine
The Hyper-V Manager opens on the desktop. Like with Task Scheduler in Windows, it looks daunting, but really isn’t.
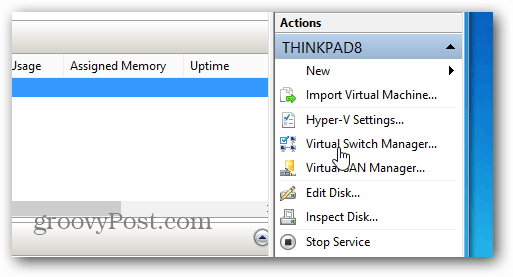
The first thing I like to do is create a Virtual Switch – which is your virtual Ethernet adapter that will use your host computers card. In the Actions Pane on the left, click Virtual Switch Manager.
Now, make sure it’s set to External so it uses your NIC. Simply click Create Virtual Switch.
Then give the Virtual Switch a name…anything that helps you remember what it’s for. Then the Connection type defaults to the Network Adapter I have installed on this machine.
Select the name of your host computer (The computer running Hyper-V). Then under the Actions pane, click New » Virtual Machine.
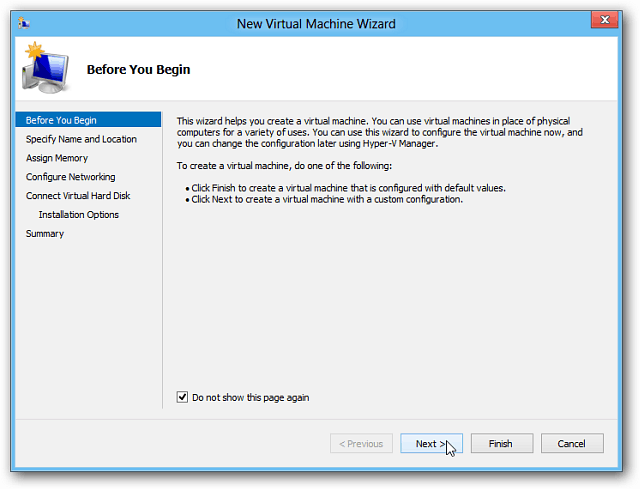
The New Virtual Machine Wizard launches to a Before You Begin message. If you don’t want to see it every time you create a new VM, check Do Not Show this Page Again. Click Next.
Continue Reading — Creating Windows 8 Hyper-V VM
Pages: 1 2 please help me. I need both connection betwwen vms and internet.
network interface card card Comment Name * Email *
Δ Save my name and email and send me emails as new comments are made to this post.

